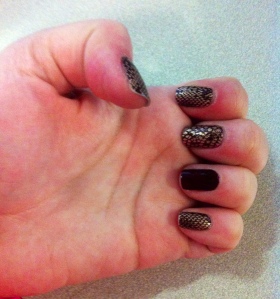
While gallivanting through Five Below the other day, I came across a great deal: 3 for $5 for Sally Hansen Nail Art Stickers! Considering that the cost of these is about $8 a pack, I could not resist such a deal even if they were the same design in different colors.
I had used the stickers once before for a Halloween design and they lasted me for about two to three weeks. The application process was very painless and the removal was even easier.
You might think that these are only made for a specific type of nail, however like press on nails, they come with a variety of shapes to fit every nail.
Because one of the trends is to paint your ring finger a different color, I did just that, which makes these stickers last twice as long since I now have the design for the ring finger saved.
The Application
As per usual, take off any existing nail polish and get your nails to a nice shape. Now the kit will come with a cuticle stick for you to push your cuticles back and I suggest that you do follow that because without it, the stickers might not fit your nails.
Now take the fine side of a nail file and rough up the top and sides of your nails. Like with a gel application, this helps the materials stick to your nails.
With a cotton swab (of some sort) give your nails a final cleaning with nail polish remover. This is very important as it helps remove the oils on your nails and helps it stick better.
Then you pick out which stickers will best fit your nails. After that take off the clear film on the top, followed by the film on the back of the nail (where it is tacky).
Fold the excess over the edge of your nail and take your nail file (usually one is provided but not always) and gently file off the excess of the sticker.
Repeat this for all of your nails and you are good to go!
Now, something that they don’t tell you to do is apply top coat. I would highly recommended doing this because it allows your nails to stay in better condition for a longer period of time.
